Web filtering lets you choose which websites your kids have access to, across all browsers and even in private mode. You can block specific websites and choose categories of websites that you want to be blocked e.g website that are related to weapons.
Web filtering works by checking the origin or content of a Web page against a set of rules. We scan the content of sites to identify and try to block all inappropriate resources and unwanted links
You can also choose to allow your child access specifically to some websites if, for example, there are educational websites that you want your kids to have access to at all times.
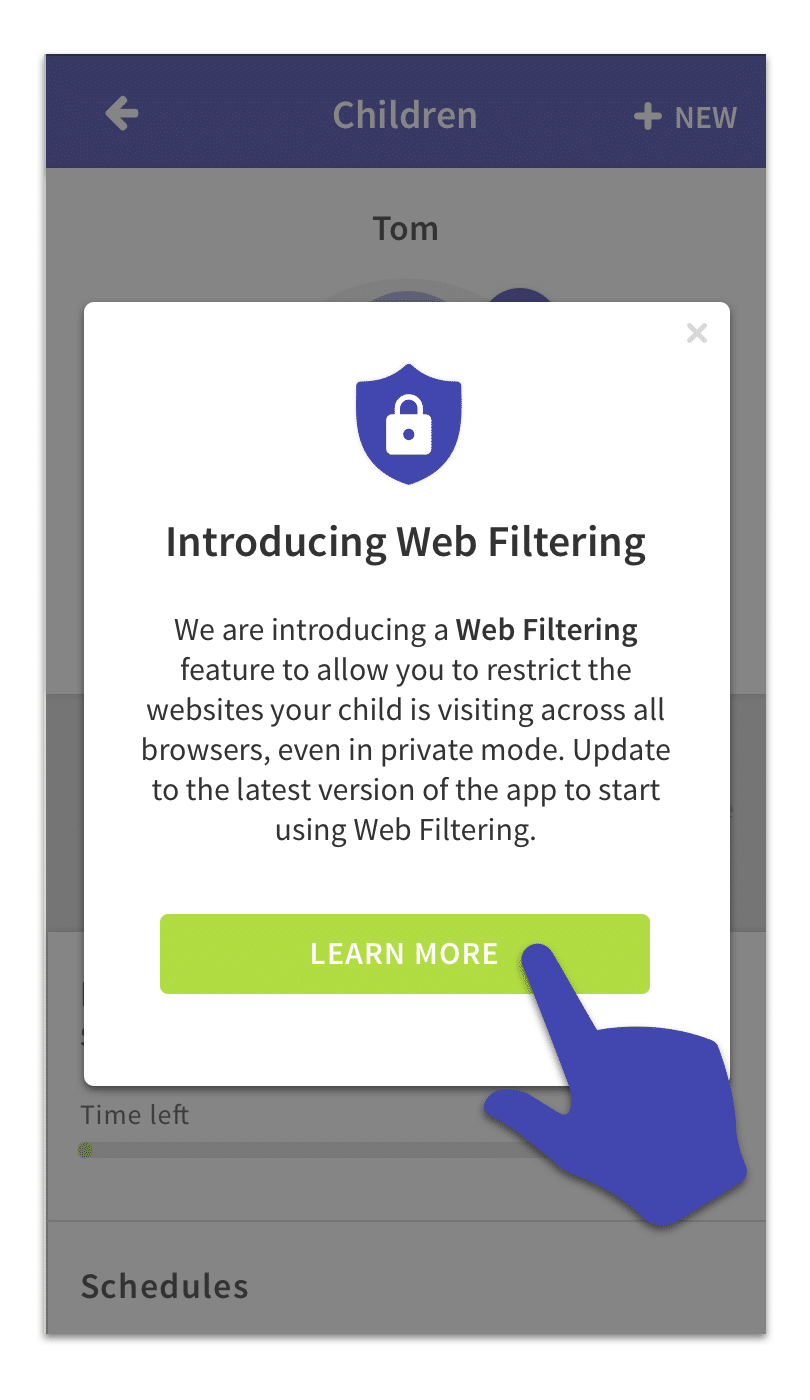
- Enable Web Filtering through the parent’s app by tapping on one of these green buttons.


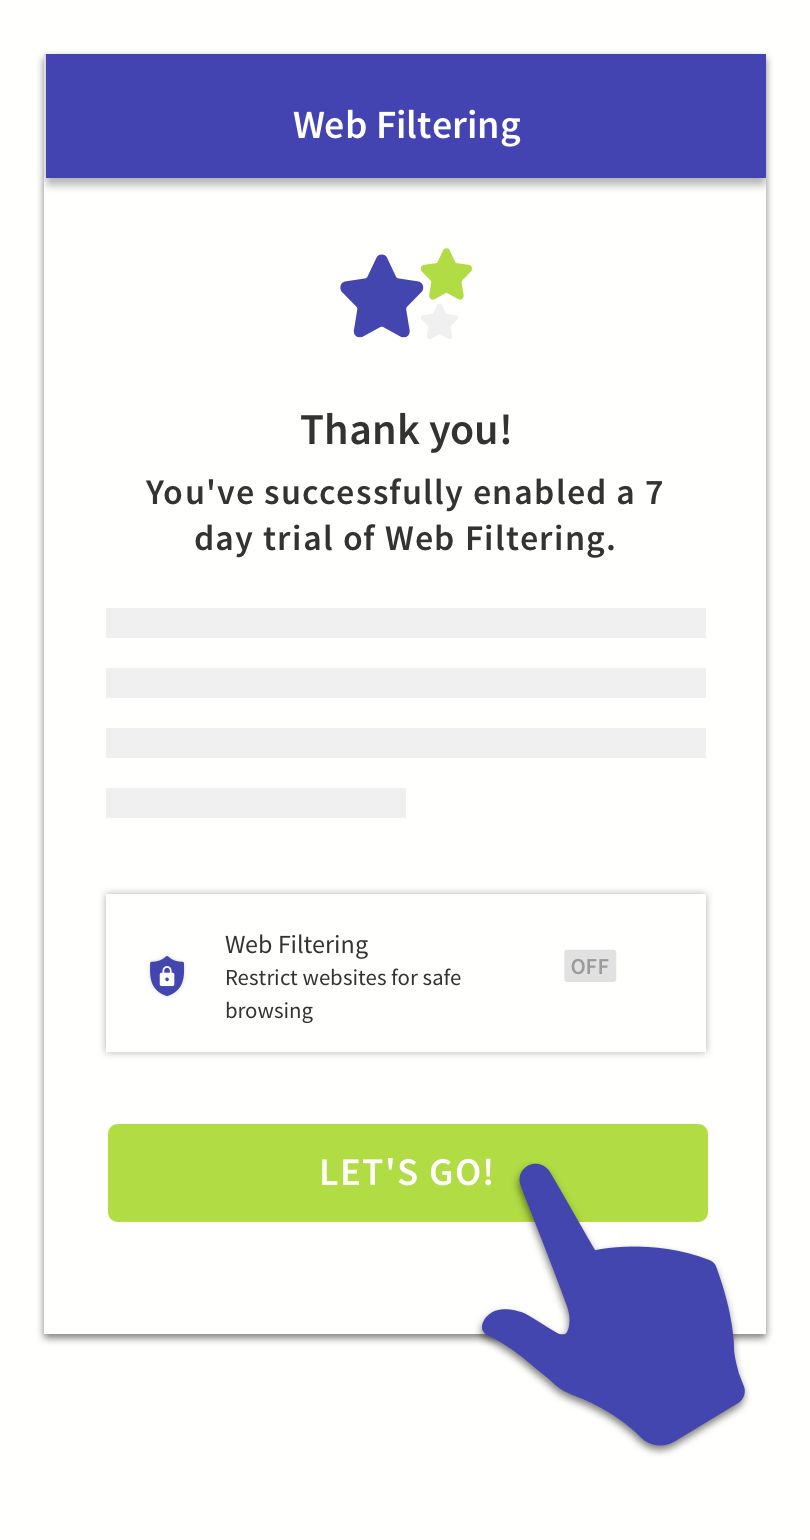
- You’ll see a screen that explains what Web Filtering is and does, tap on Enable Web Filtering and then Let’s Go
- Scroll down the child profile page until you see the Web Filtering section and tap on that to see the settings.
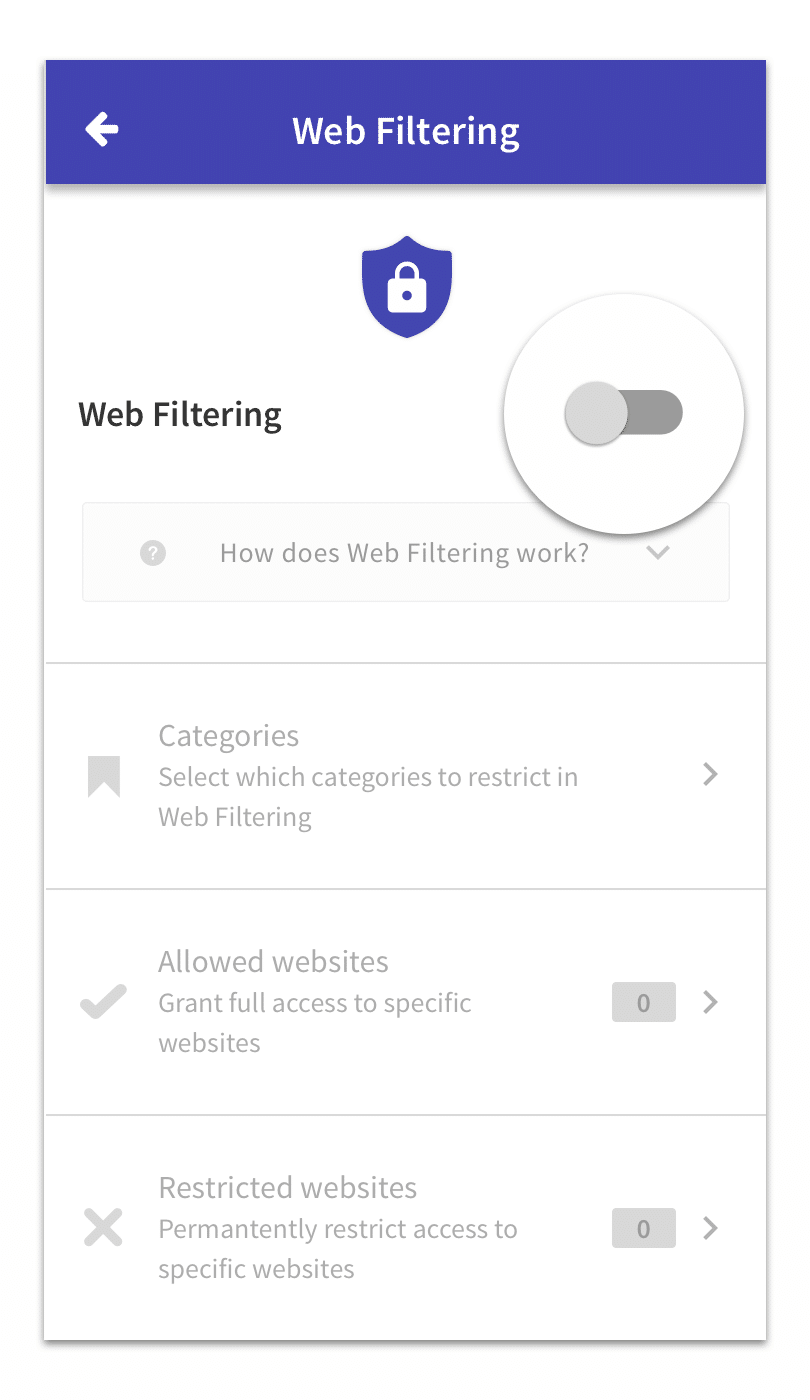
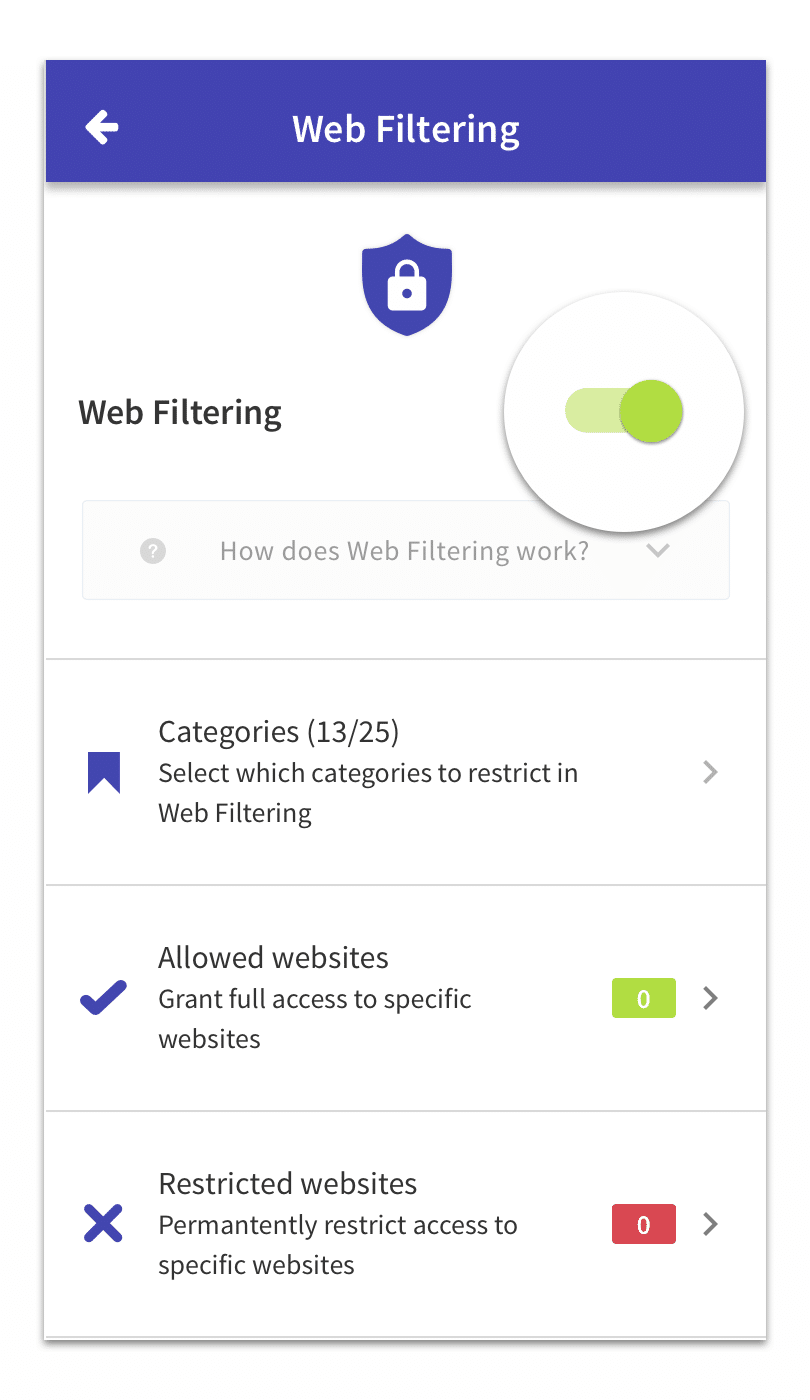
- To start using Web Filtering tap on the switch at the top of the page to turn it on.
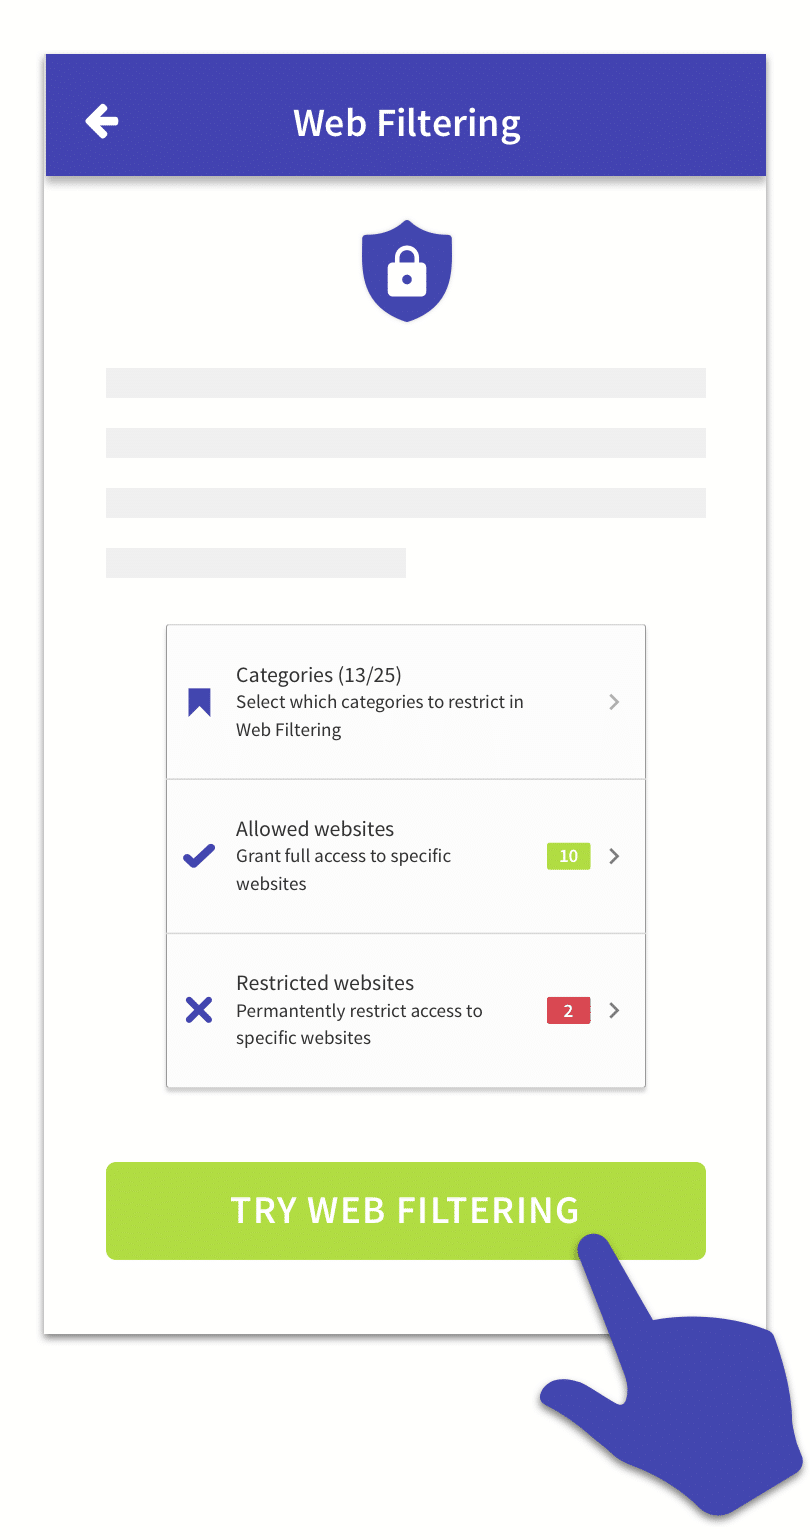
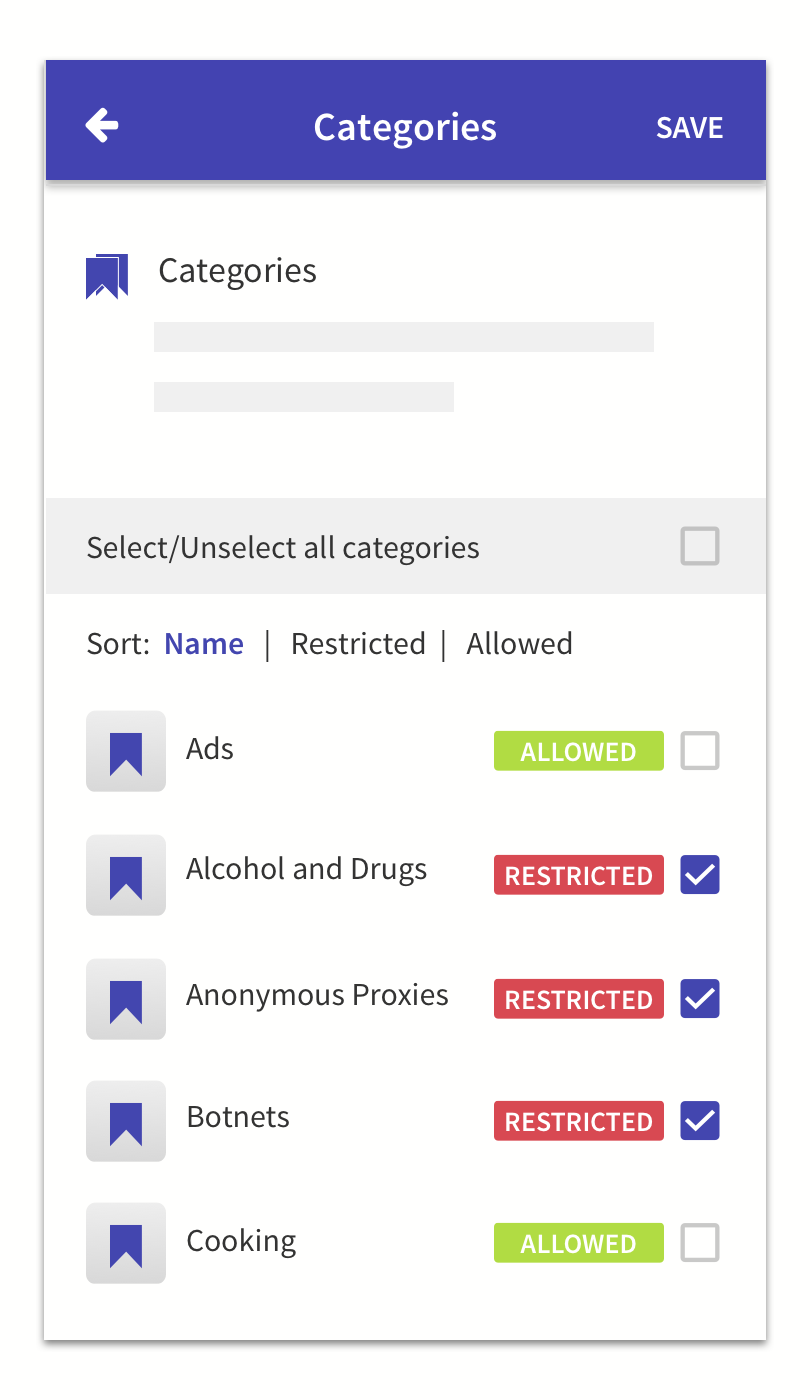
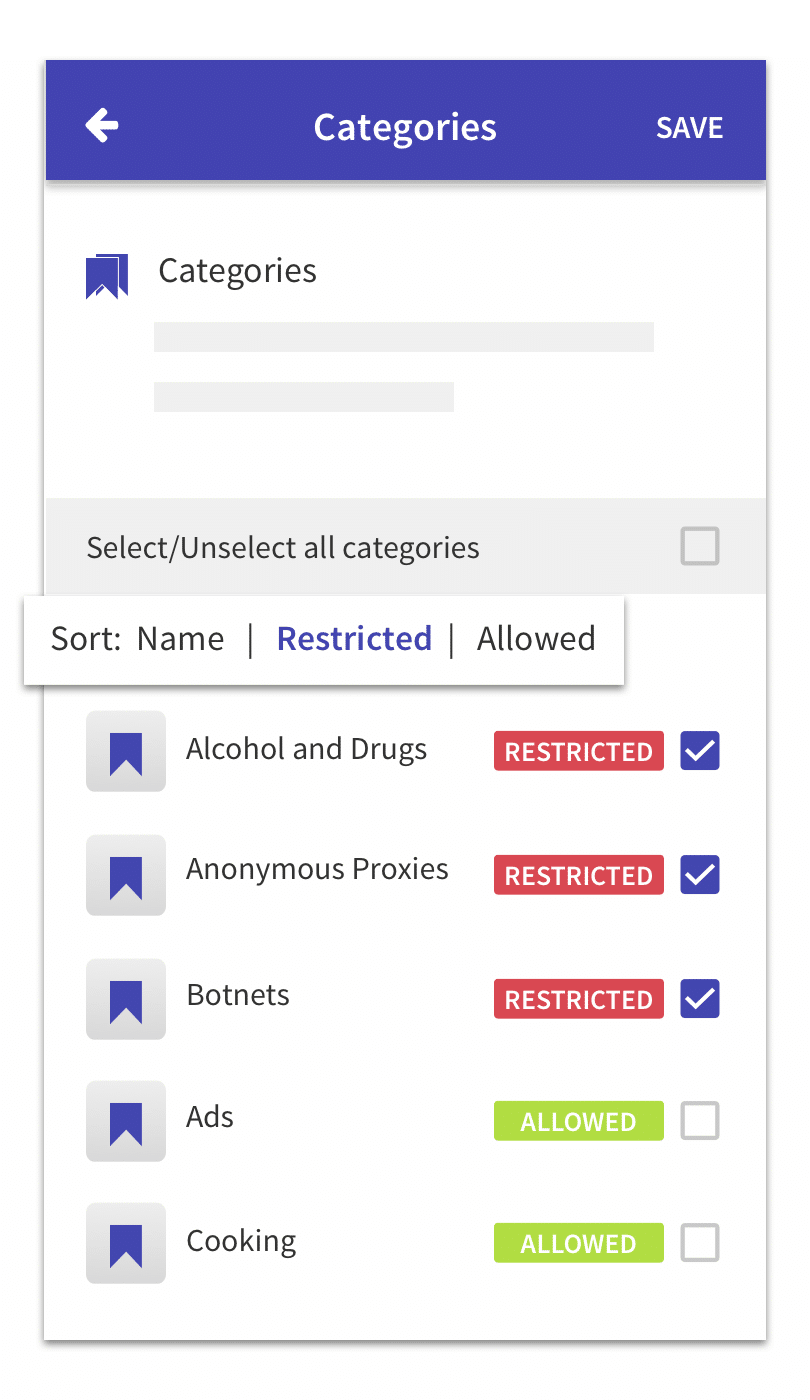
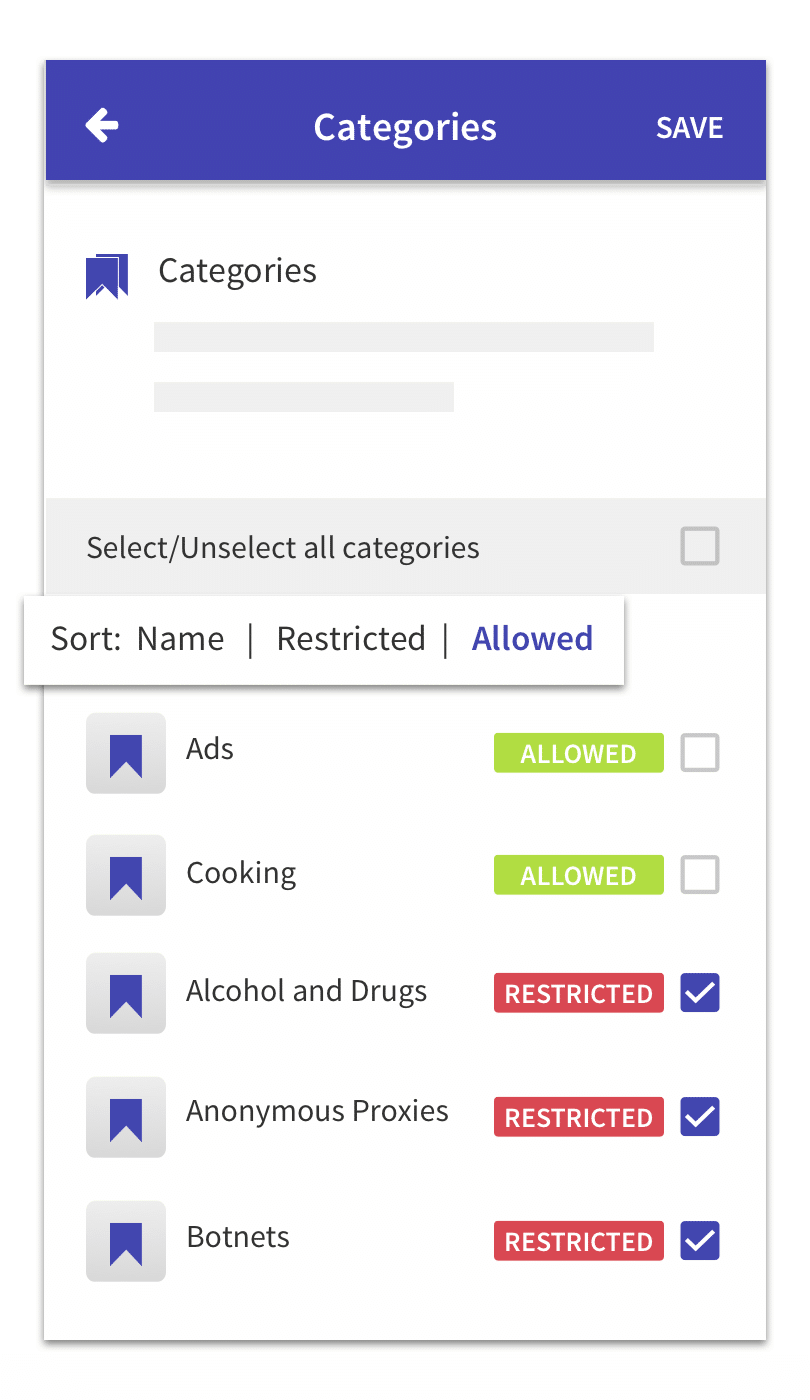
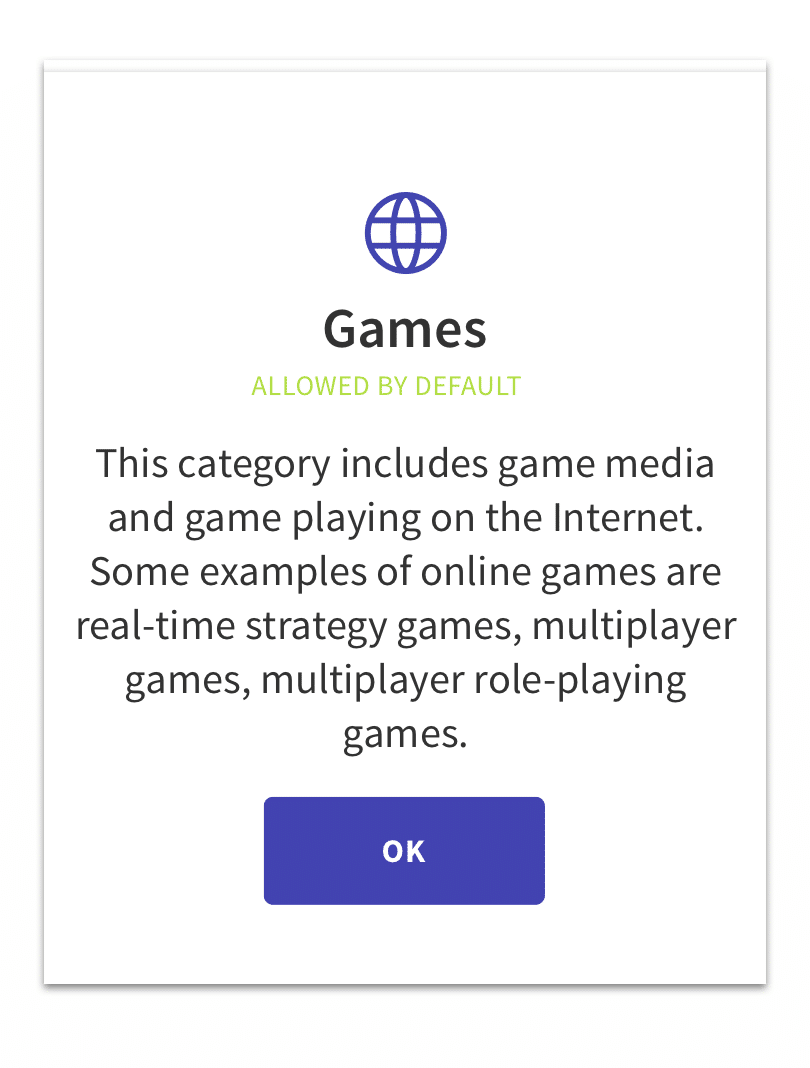
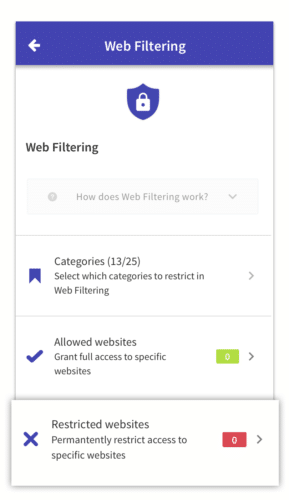
- Now you can start filtering websites. First of all tap on the Categories section. Categories are in alphabetical order and some of them are restricted by default (here you can see a list of categories which are restricted by default). To see the restricted categories first, tap on the Restricted filter at the top. If you want to see the allowed categories first, tap on the Allowed filter.
- Go through the categories and restrict the ones you don’t want your child to have access to by tapping the checkbox next to the category name.
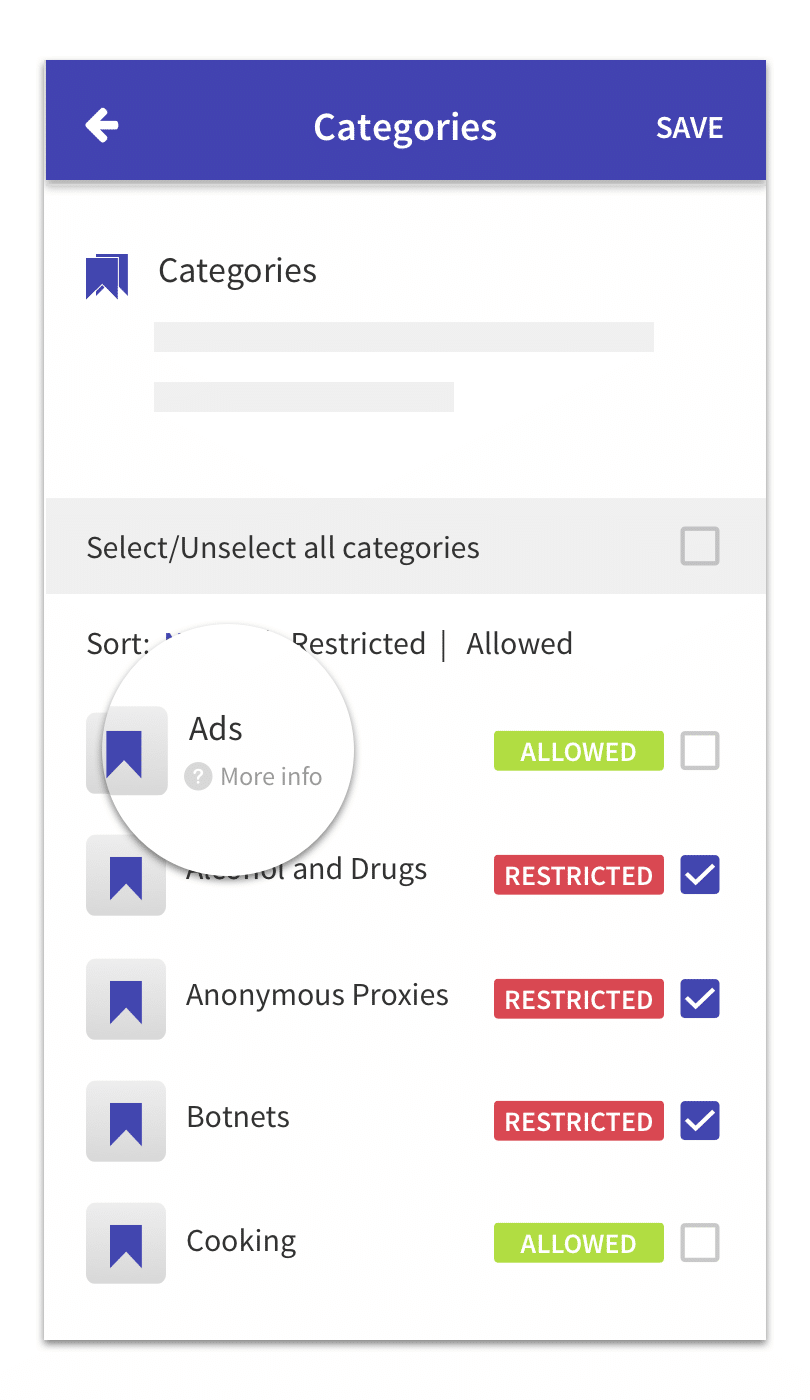
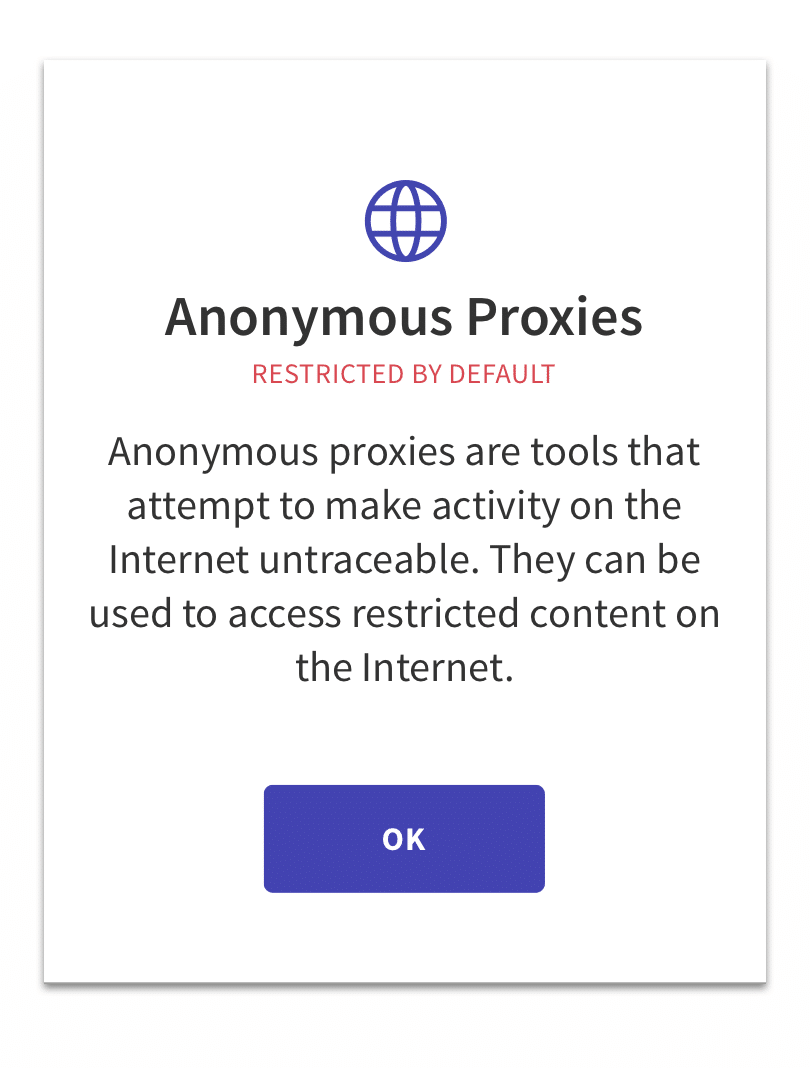
- If you’re not sure what a category title means then tap on More info to see a more detailed explanation.
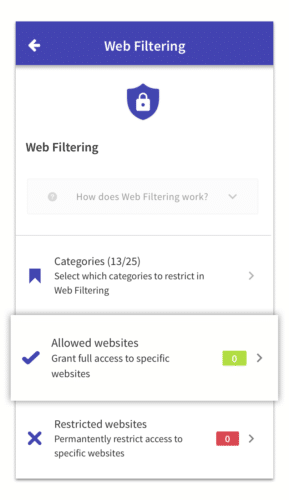
- Next go back to the main Web Filtering settings page, and tap on the Allowed websites section.
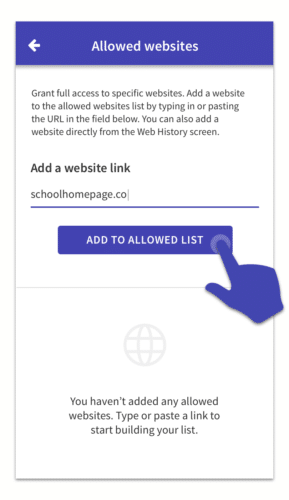
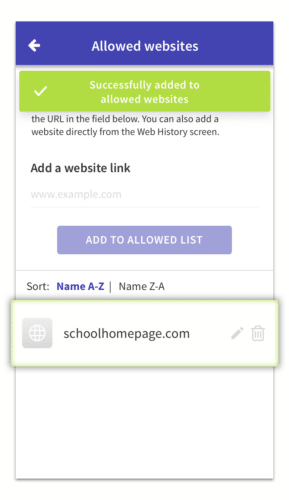
- Enter the websites that you want your child to always have access to and tap ADD TO ALLOWED LIST, your child will always have access to these websites so it’s good for school and educational websites. This setting overrides the main categories – for example, you can allow a specific website that is part of a restricted category.
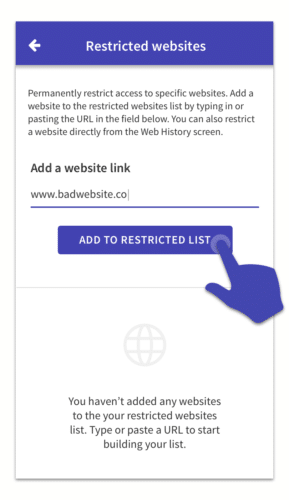
- Lastly, let’s choose which websites should be permanently blocked, go back to the main Web Filtering page and tap on Restricted websites.
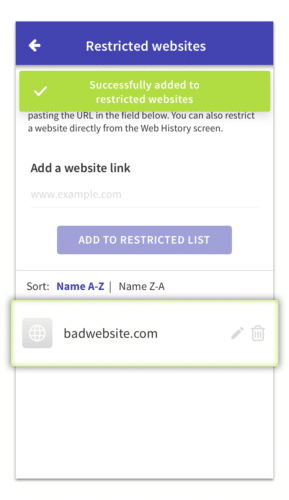
- This is a good place to put websites that you know of that you don’t want your child to ever have access to. Just type in the website and tap on ADD TO RESTRICTED LIST. This setting overrides the main categories – for example, you can restrict a specific website that is part of an allowed category.
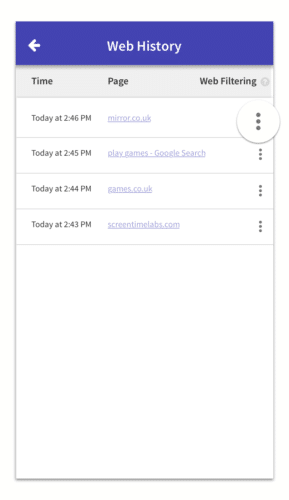
- You can also block or allow specific websites from within the Web History section by tapping on the 3 buttons to the right of the website name. Allowed websites will be displayed in green, while restricted websites will be displayed in red.


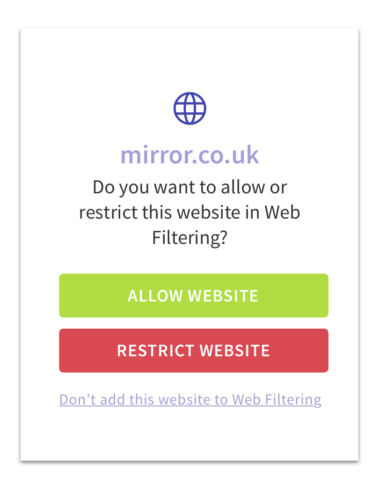

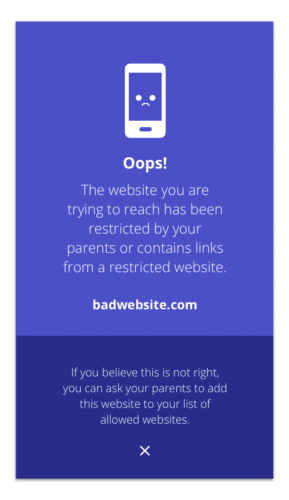
And if you were wondering what happens on your child’s device, this is what your kids will see when they try to visit a restricted website.